Choose AI models
Use the current Studio selectors to balance quality, speed, input support, and credits across text, image, and video generation.
Written By Rishikesh from ngram
Last updated 12 days ago
Read before this
Model selection in V2
V2 chooses its generation models for you. Use the public composer controls for the brief, style, pace, duration, narrator, avatar, and aspect ratio. There is no ordinary V2 model picker corresponding to the V1 selectors below.
To use a model-specific V1 workflow, select V1 on Home and follow the available selectors for that workflow.
V1 workflow
The instructions and screenshots below apply to V1 projects. In V2, use the workflow above; the same direct editing controls may not be available.
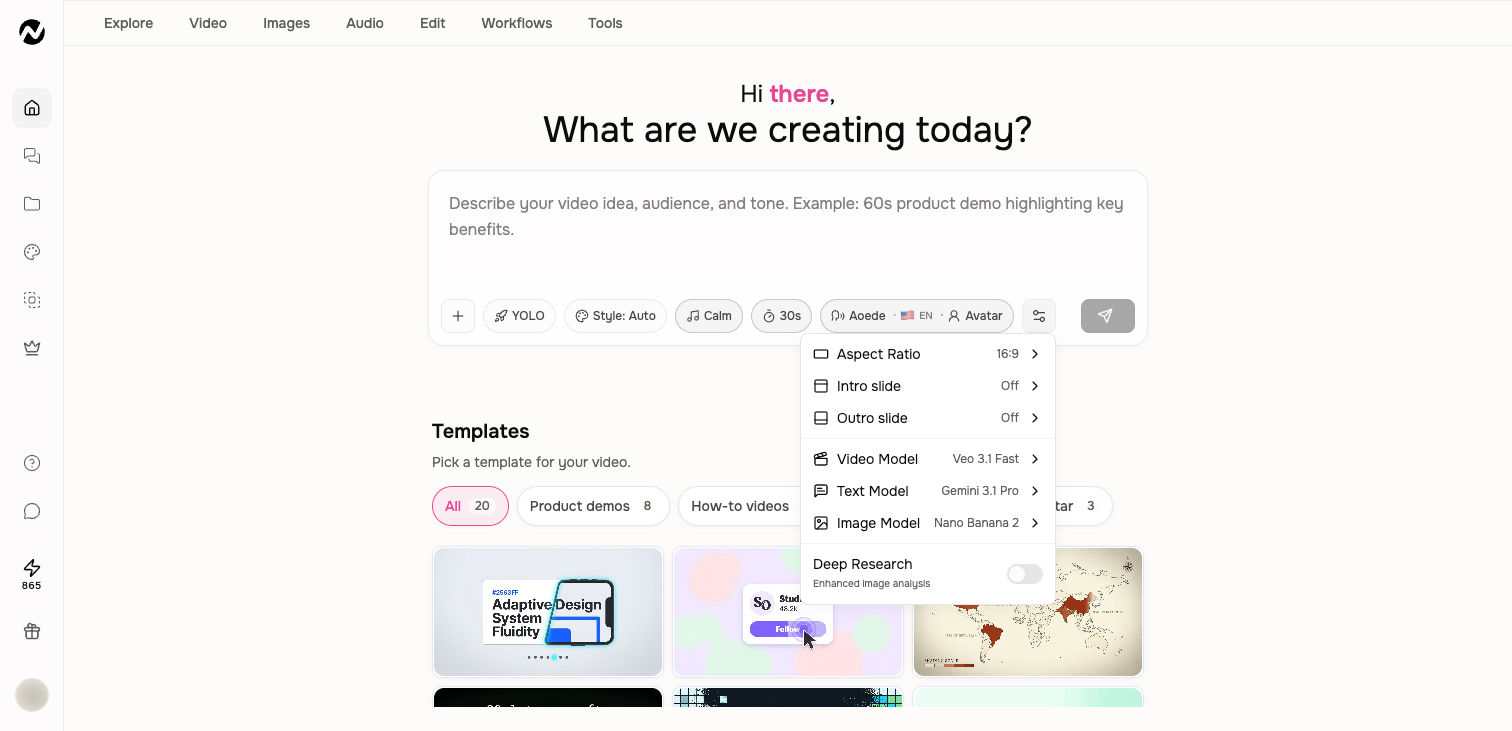
What each model controls
- Text model: research interpretation, planning, script, and reasoning quality.
- Image model: still visuals, keyframes, references, and image edits.
- Video model: motion generation, supported frame inputs, duration, speed, and video cost.
Use the live selector
Model availability and defaults change frequently. The current selector is the source of truth for your account. It also reflects whether a model accepts a prompt only, a first frame, first and last frames, or multiple references.
Do not assume the most expensive model is best for every scene. A faster model is often better for iteration; reserve premium generation for the shots where the quality difference matters.
A practical selection strategy
- Start with the default models for the first complete draft.
- Identify the specific scene or output that needs improvement.
- Change only the relevant model and review the displayed cost.
- Regenerate the smallest useful scope instead of rebuilding a good video.
Avoid frozen model lists
If a model name in a screenshot or older article is missing, choose a current model with the same job: planning, image generation, image editing, or motion. Help documentation is dated, while Studio's selector is live.
Before you finish
Before spending credits on another generation, check the script or storyboard, identify the smallest part that needs improvement, and change only the setting responsible for that result.
Keep going
- Choose a visual style — Use Auto, style presets, templates, and Brand Kit without confusing their roles.
- Understand credits — Understand credit estimates, reservations, charges, plan grants, top-ups, and auto top-up.
- Create short AI video clips in Clip Studio — Use Clip Studio input modes, models, duration, aspect ratio, cost estimates, history, and downloads.
Continue in ngram
Open the relevant Studio surface and follow the current controls shown in your account.
Was this helpful?
Still need help? Ask the team