Record your screen and create a polished screencast
Capture a product walkthrough in the browser, review the recording, then add it as source video for editing or AI-assisted polishing.
Written By Anish Muppalaneni
Last updated About 1 month ago
Read before this
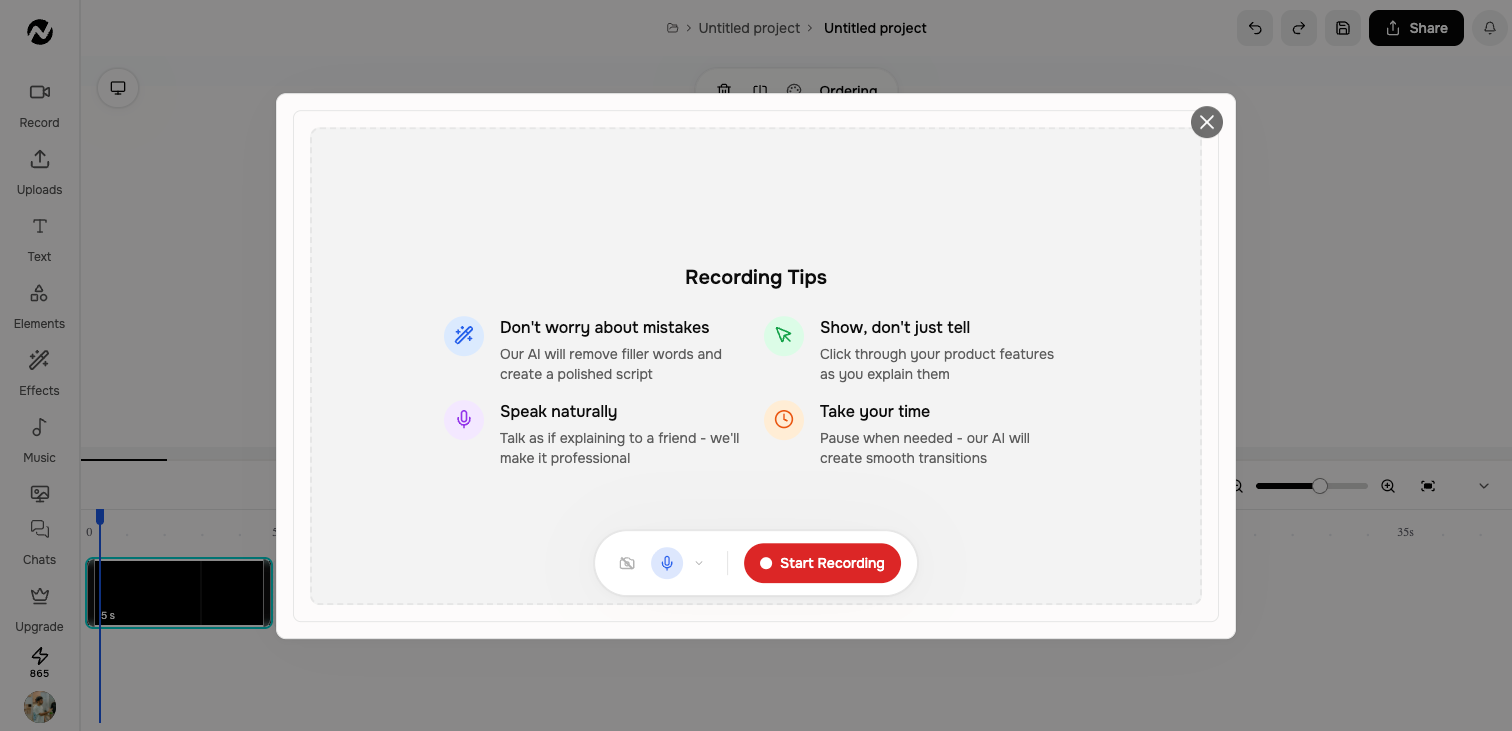
Use this when you need to show a real on-screen workflow
Use Screen Recorder for a product walkthrough, tutorial, bug demonstration, or screencast source where the real order of clicks matters. The recording can remain source footage or become the basis for a polished demo with narration, captions, zooms, click emphasis, trimmed pauses, and section transitions.
Before you start
Sign in, open the Screen Recorder from Tools, close private tabs and notifications, and prepare a safe demo account. Decide whether you need screen only, microphone, or available system audio, and confirm browser and macOS permissions before recording the full walkthrough.
Start a recording
- Open Screen Recorder from Tools.
- Review the recording tips and choose Start Recording.
- Select the browser tab, window, or screen requested by your browser.
- Allow microphone or system audio only when the walkthrough needs it.
- Perform the product flow, then stop and review the recording.
Record a useful walkthrough
- Close private tabs and notifications first.
- Use a clean demo account with safe sample data.
- Move the pointer deliberately and pause after important actions.
- Speak naturally; ngram can turn the recording into a cleaner script and structure.
- Do not expose passwords, API keys, personal data, or customer information.
After recording
Review the capture before adding it as source video. From the editor or agentic handoff, trim or restructure the walkthrough, add narration, captions, music, or an avatar, and remove mistakes that do not belong in the final story.
Enhance a qualifying recording
When a Screencast or Screencast + Avatar keeps speech from the source video, the pre-start flow can show Enhance your recording. Each option is optional; review the untouched recording before deciding what to change.
- Remove filler words from the source speech.
- Remove long pauses or tighten pacing.
- Isolate the voice from background sound.
- Change the narrator voice while preserving the source delivery and timing.
- Apply the visible screencast enhancement option when the recording qualifies.
Expected result
After you stop, the review should play the complete intended screen area with the audio you chose. The saved result can then be downloaded, opened in the editor, or carried into a video workflow as source footage. Review the complete recording before asking ngram to polish it.
If screen or audio capture does not work
Keep any usable recording. If the picker does not show the tab, window, screen, or audio source you need, check browser and macOS screen-recording or microphone permissions, reload the recorder, and make one short test. Do not repeat the full walkthrough until the test has the expected picture and sound. Contact Support if the permitted source remains unavailable or the same short test fails again; include the browser, macOS version, selected source type, approximate time, and visible error without sharing private footage in the first message.
Screen Recorder FAQ
Can I turn a screen recording into a polished product demo?
Yes. Record or upload the real walkthrough, review it, then use it as source footage for a Screencast or Screencast + Avatar workflow and request the narration, captions, pacing, zoom, and click emphasis you need.
Why can I not see the tab or window I want to record?
Check the browser's share picker and macOS screen-recording permission, reload the recorder, and make one short test. Contact Support if the permitted source still does not appear.
Why does my screen recording have no audio?
Confirm whether the walkthrough needs microphone or an available system-audio source, allow the corresponding permission, and make a short test before recording again. The sources offered can depend on the browser and selected share type.
Does polishing change the real order of the workflow?
It can trim pauses and add narration, captions, zooms, click emphasis, or transitions. Tell ngram to preserve the actual action order, then compare the complete result with the original recording before publishing.
Keep going
- Choose a video type — Choose between motion graphics, avatar, screencast, and other video types visible in Studio.
- Use the full video editor — Understand the full editor and how it differs from inline agentic editing.
- Use sources and attachments — Add URLs, documents, images, recordings, and other reference material to a video request.
- Understand generation status, retries, and recovery — Troubleshoot slow, stopped, failed, or disconnected video generation without relying on fixed time promises.
Continue in ngram
Open the relevant Studio surface and follow the current controls shown in your account.
Was this helpful?
Still need help? Ask the team